How to Measure for a Shower Door: A Step-by-Step Guide
When it comes to things to consider before installing a shower door, precision when measuring is everything. Even the smallest miscalculation can lead to leaks, uneven gaps, or doors that don’t fit at all – which is why learning how to measure correctly is the first step toward getting a flawless installation.
No one knows that better than us at The Original Frameless Shower Doors® – we’re the brand that started it all and brought the frameless revolution to the states.
For over 30 years, we’ve built the finest shower doors available in the US, all designed, manufactured, shipped, or installed by the best technicians in the country. Every enclosure we make begins with accurate, detailed measurements, because a perfect fit is the foundation of our craft.
Here’s how to do it right.
Step 1: Gather the Right Tools
You’ll need:
- Watch our videos and use our InstallationEASY(R) process. We’ve taken everything into account, ensuring your DIY frameless shower enclosure looks like one of our seasoned experts installed it.
- A tape measure
- A level
- A notepad or phone to record measurements
- A helper, if possible – glass panels can be large and unwieldy
Accuracy matters to the sixteenth of an inch. If you’re replacing an existing door, remove it first so you can measure the opening cleanly.
Step 2: Measure the Width
Measure the width of your shower opening at three points: the top, middle, and bottom.
Write down all three numbers – walls aren’t always perfectly square. If there’s a difference, note the smallest measurement. That’s your “tight” dimension. Follow our measuring instructions and videos on how to measure. Our proprietary door builder is a game changer! Our tech department is always a call or facetime away, six days a week to ensure everything is perfect.
For frameless enclosures, precision like this prevents leaks and uneven gaps.
Step 3: Measure the Height
Measure from the top of the threshold (or shower curb) to the height you’d like the glass to reach – typically around 80”. Standard heights are around 72” to 76” inches, but custom designs can go higher for a more open, spa-like feel.
Keep your level handy here. If your floor or curb isn’t perfectly level, record the difference. That helps our fabrication team cut the glass so it aligns evenly once installed.
Step 4: Check for Out-of-Plumb Walls
Even new construction can have slight imperfections. Place your level vertically against each wall to check if they’re plumb. If one side leans inward or outward, record the difference. This is crucial data for a frameless enclosure, where glass must line up perfectly without compensating metal framing.
Our technicians account for these details automatically when measuring on-site. That’s why professional measurement always gives the most precise results – but it never hurts to understand the process yourself, that’s why we created InstallationEASY(R). We provide everything that’s needed, ensuring everything’s done right the first time.
Step 5: Verify Angles and Layout
If your shower includes an angled return panel, bench, or knee wall,follow our instructions,and measure each side carefully and sketch the layout. Label where the door will swing or slide.
Our in-house design team uses this information to generate a digital drawing before fabrication. That way, you can confirm everything looks right before glass cutting even begins.
For those planning a project, take a look at our guide on hands-on solutions for homeowners – it includes clear instructions and tips to help you visualize every measurement.
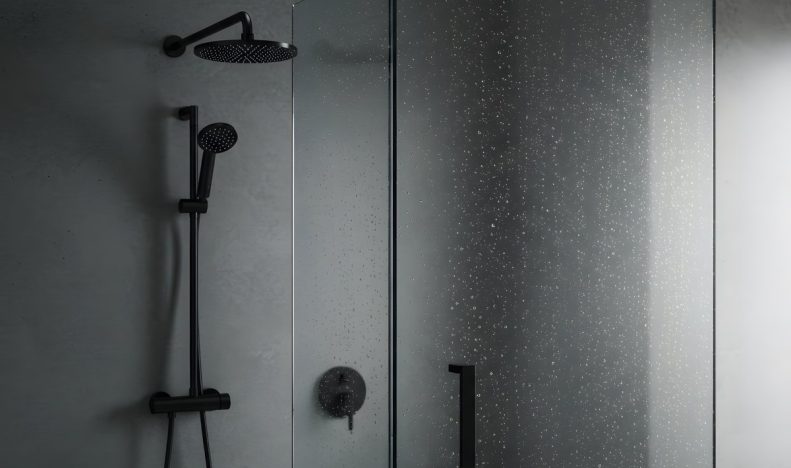
Why Pick Our Frameless Shower Doors
Measuring is important – but execution is everything. At The Original Frameless Shower Doors®, every project moves through our controlled process:
- Our InstallationEASY(R) process will make you feel like one of our in-house pros!
- Digital Measuring Systems: Our teams use laser-accurate tools for perfect data capture.
- In-House Fabrication: Glass is cut, polished, and tempered in our Coral Springs facility to match your exact specifications.
- Expert Installation: Our Frameless University® schooled technicians are among the best anywhere, ensuring precise fitting and watertight performance.
- Custom Options: Whether you want clear, frosted, low-iron, or patterned glass, we build it exactly as you envision.
We don’t adjust to fit imperfect openings – we build glass that defines them. That’s why our doors are known across the U.S. for flawless alignment and enduring performance.
Common Measurement Mistakes to Avoid
- Assuming your walls are square. They rarely are – always measure multiple points.
- Measuring finished tile too early. Wait until tile and grout work are complete before taking final measurements.
- Forgetting the curb slope. Every shower should slope slightly inward; record it so your door seals properly.
- Not accounting for hardware clearance. Hinges and handles need space – our designers factor that in automatically.
- Ordering before consulting a professional. DIY measurements are a good start, but expert verification prevents costly errors.
Even if you’re confident in your numbers, having our team confirm them ensures your custom glass arrives perfect the first time.
The Bottom Line
Measuring a shower door does sound simple, but it’s the most important step in getting a watertight, perfectly balanced enclosure. Getting it wrong means small errors can turn into big headaches later.
When you work with The Original Frameless Shower Doors®, precision is non-negotiable from the get-go. From laser measurement to final installation, every step is handled by experts who’ve been perfecting the process for over three decades. Our doors are the benchmark of quality, built to your exact specifications, and backed for life.
FAQs
Should I measure before or after tiling?
Always after. Tile and grout change wall dimensions slightly, and measuring too early can cause errors.
What if my shower walls aren’t perfectly square?
That’s normal. We fabricate each glass panel to fit those irregularities precisely, so your finished enclosure looks seamless.
How long does it take from measuring to installation?
Typically 5–7 business days. Our in-house production speeds up turnaround while maintaining precision.
Can I install the door myself if I measure accurately?
Yes, we offer nationwide shipping and DIYInstallationEASY(R) kits with professional-grade glass and hardware.
What if I make a mistake in my measurements?
Our team reviews every order and can help you verify dimensions before fabrication. We’ll catch issues before they become costly.